Granting Access
- To grant your E-Verify users access to the Portal Integration, they should first be added to the E-Verify account linked to the integration as either a General User or Program Administrator. Only 1 Web Services Access user is needed per E-Verify Account.
- In the Employee Portal, navigate to Admin>Portal Settings>Onboarding/ATS. Here you will find the "User Group for Onboarding E-Verify Permissions" setting. You can add everyone you would like to be able to create cases through the Portal to this User Group.
- With access granted in both E-Verify and the Employee Portal, this user should be ready to use the "Start E-Verify" button in Onboarding to create cases in the Web Services Access E-Verify Account.
Creating Cases
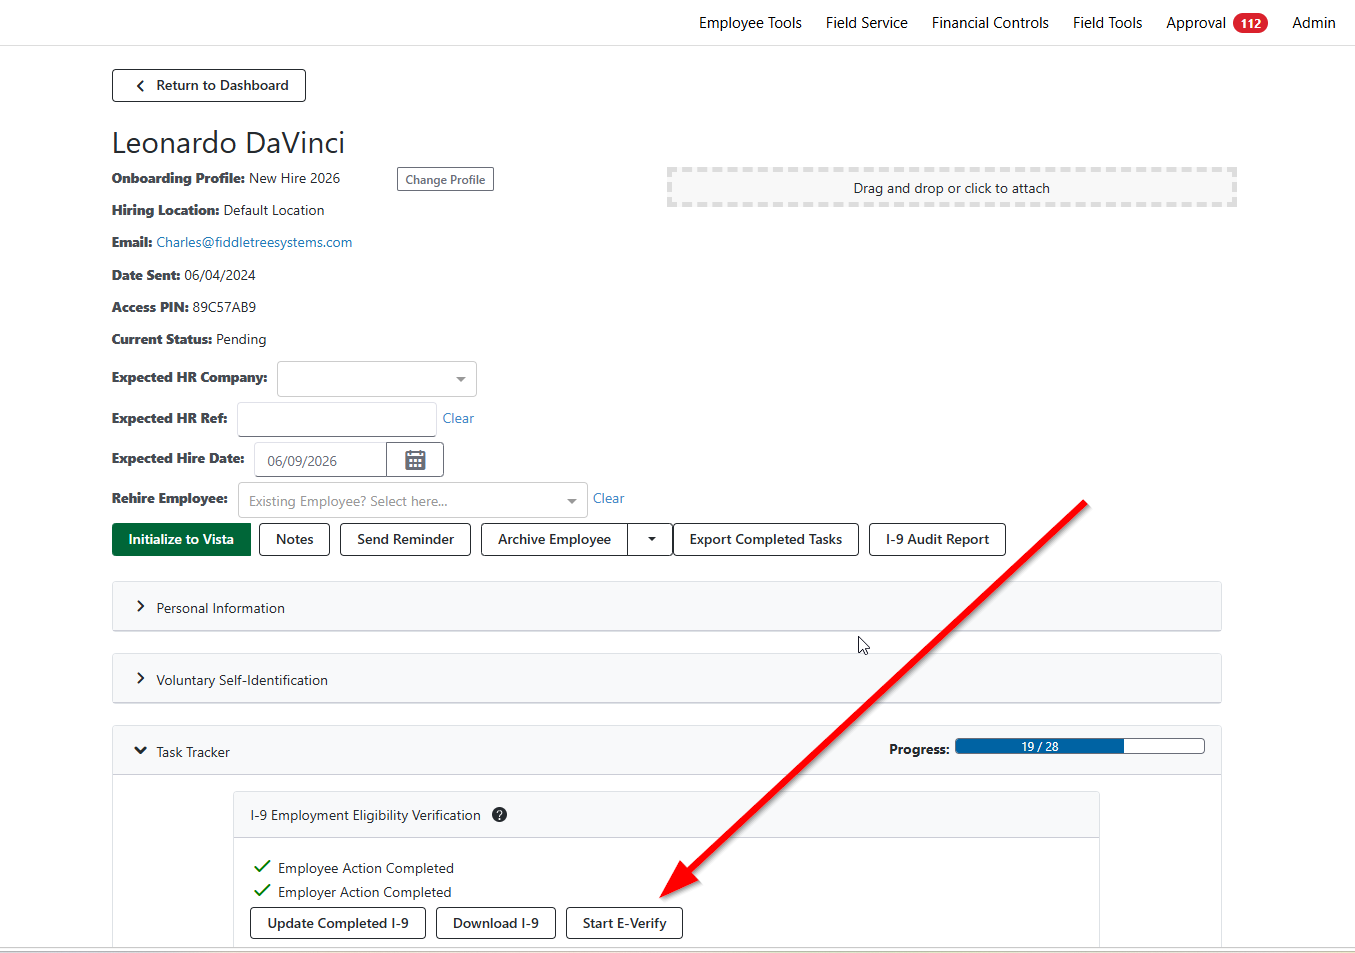
- In Onboarding, you can click into an employee who has a fully completed Form I-9 and expand the Task Tracker. Next to the I-9 is the "Start E-Verify" button, which can be used to begin case creation.
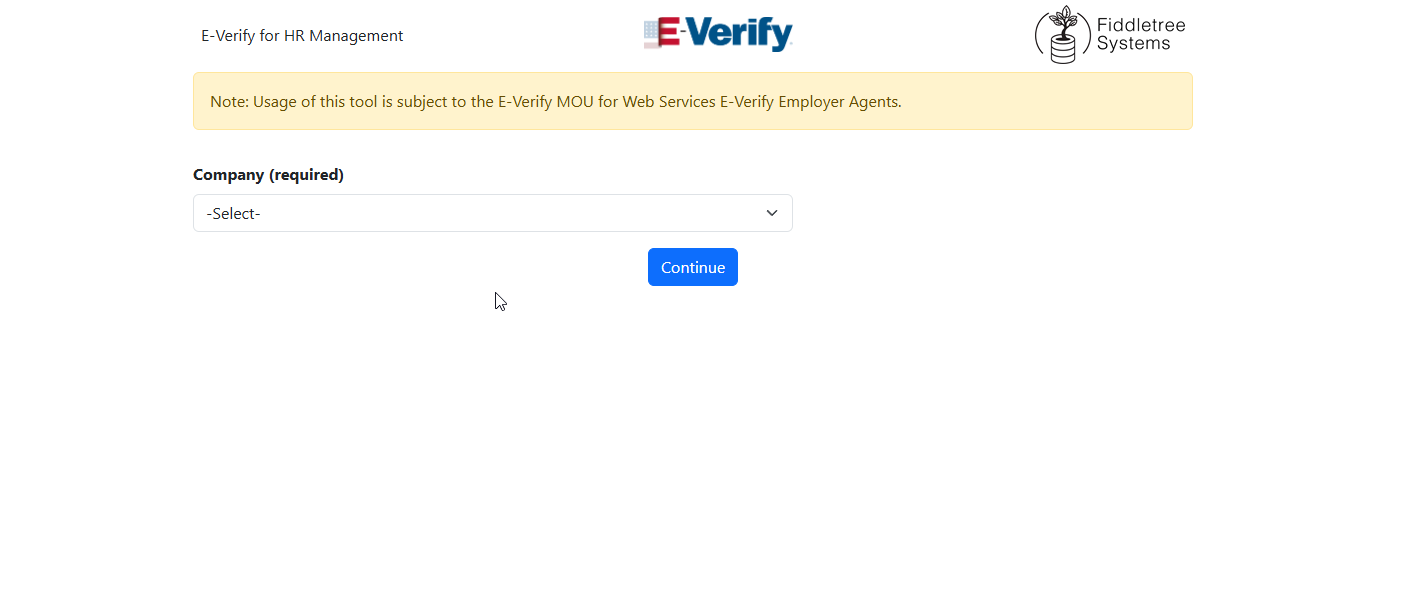
- This will open a new tab to create the E-Verify Case. The First page will have you select which E-Verify Account to create the case in. If this dropdown does not appear, it means you have just the one E-Verify Account and can select "Continue".
- The next page is where you can review the Employee Information and Employment Eligibility Information. Everything from the upper Employee Information section comes from the Step 1 of the Form I-9, so if there is an issue here then the employee must go back and update their I-9. If there is something wrong with the lower Employment Eligibility Information section, then you as the employer can back and update the step 2 of the Form I-9.
If the case is created more than 3 days after the employee's Hire Date, a reason must be provided just as it would in E-Verify. Once your review of this information is complete, you can proceed with case creation.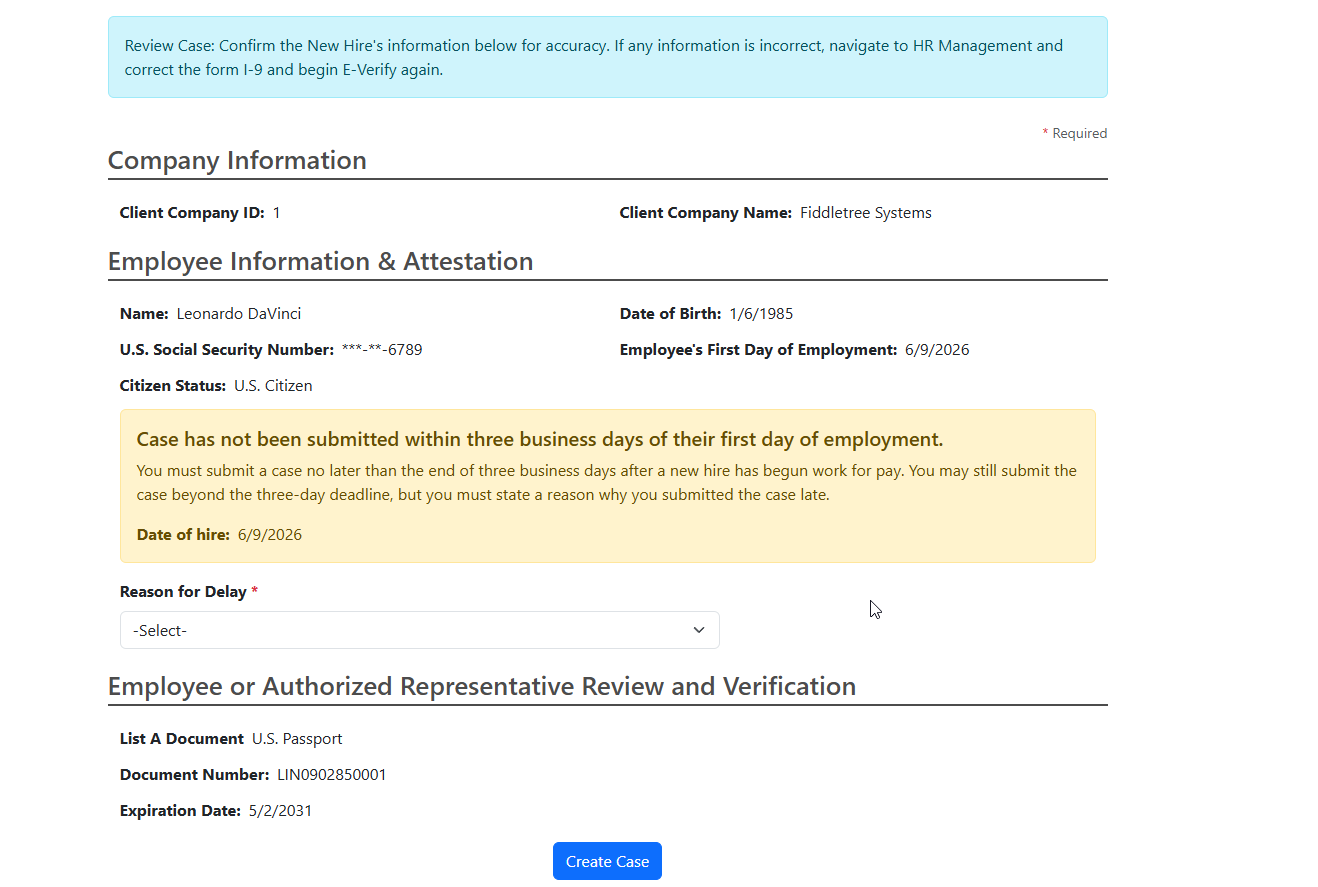
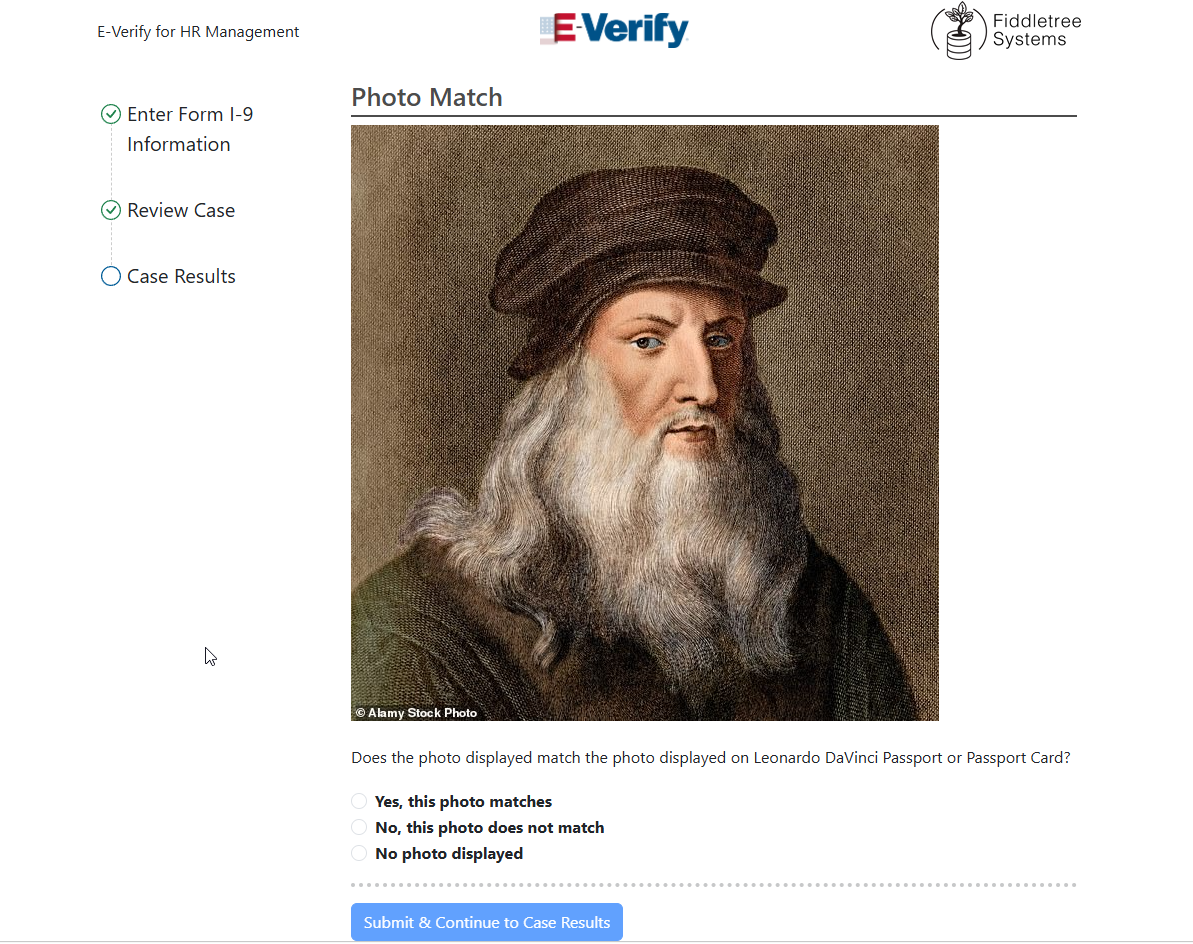
- If the document used requires a Photo Match, the next page will have you verify that the photo matches, just as it would in the E-Verify site. If the Photo Matches, you can submit to finish creating the case.
- This last page will give you your Case Number and Case Status. If the Employment was not immediately authorized, then this case must be further managed and eventually closed within your actual E-Verify Account. If the case is successfully authorized and closed, you can proceed to step 6 of this article.
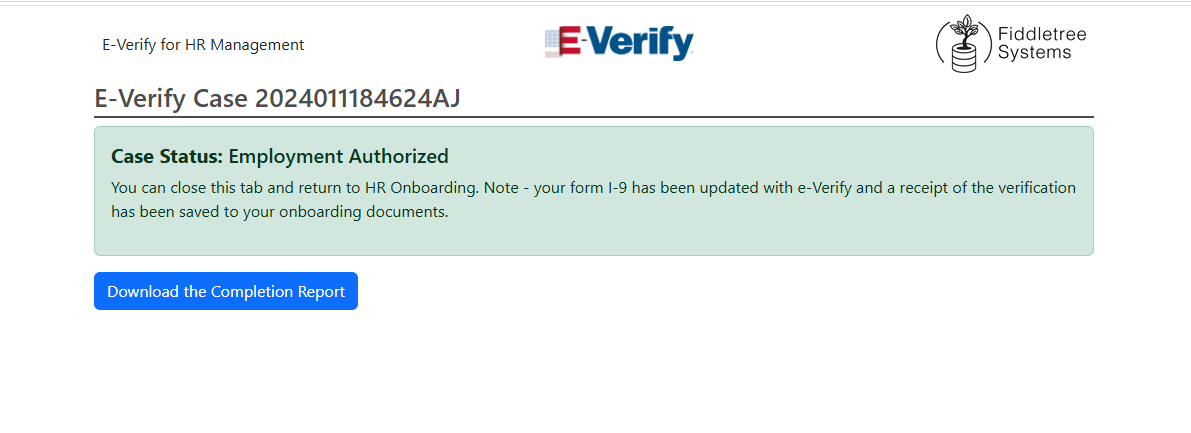
- With a successful case, you can return to the Onboarding Profile and refresh the page. In the top right corner, we'll automatically attach the Case Confirmation PDF. Additionally, we'll add the Case Number to the Additional Information section of the Form I-9. When this employee is Initialized, both the Case Number and Form I-9 will attach to the Employee Record in Vista.
Onboarding Profile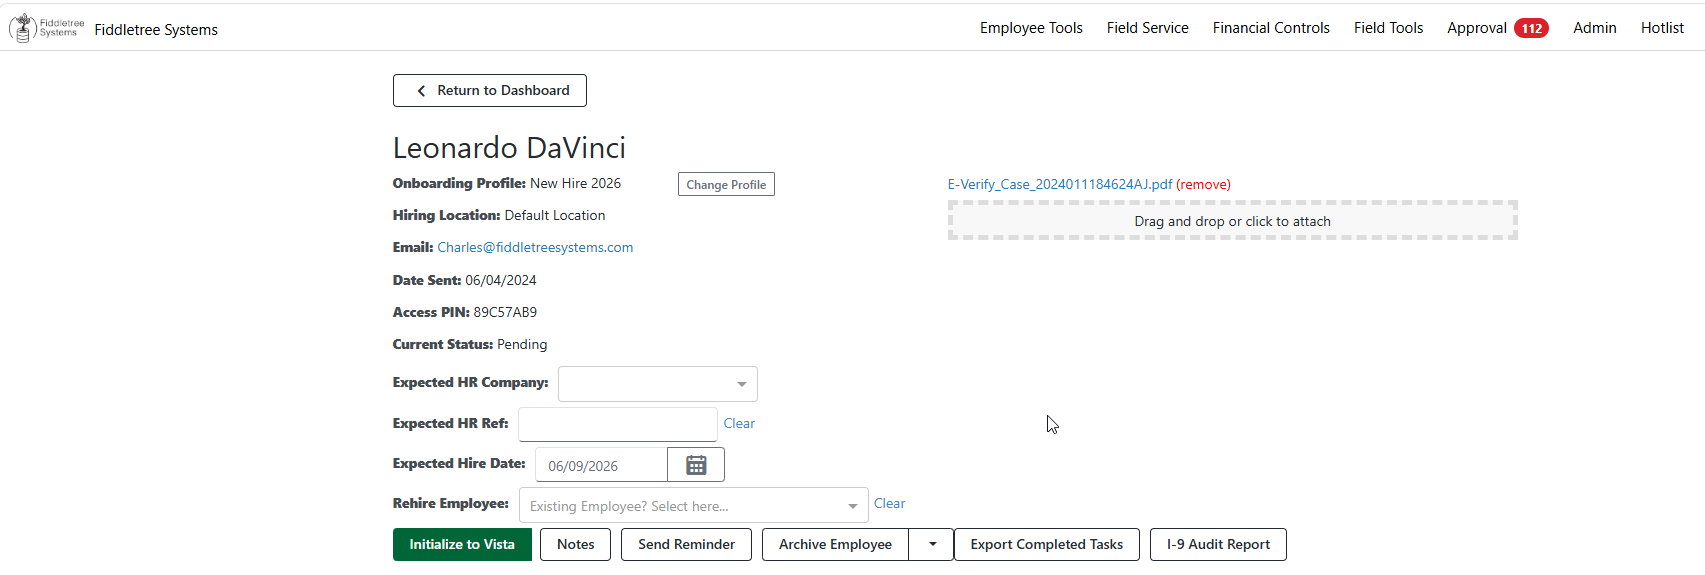
Case Confirmation PDF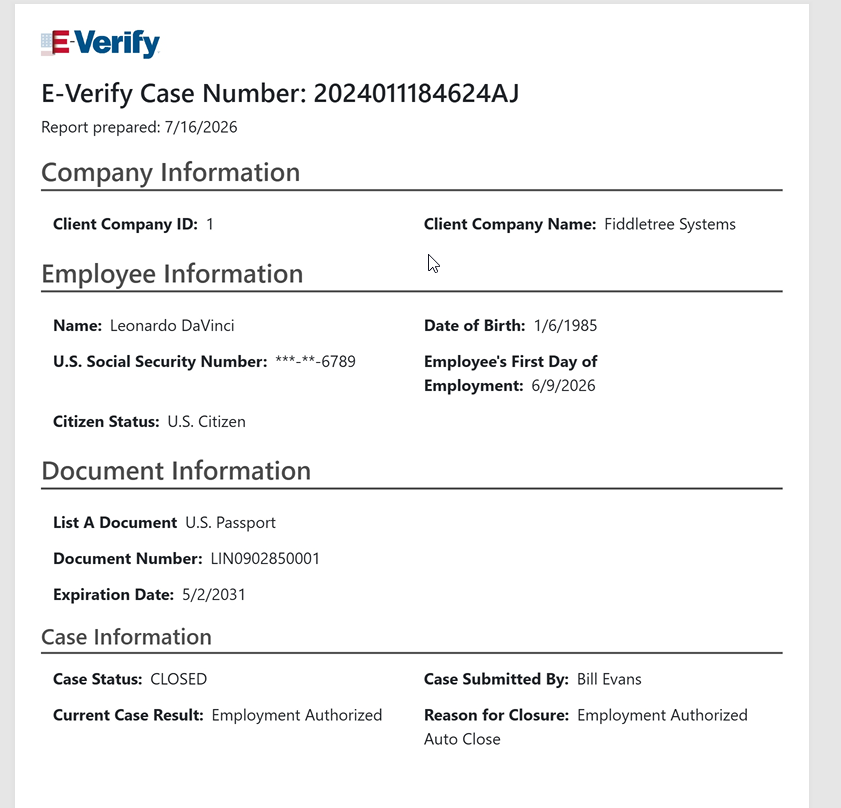
I-9 with Case Number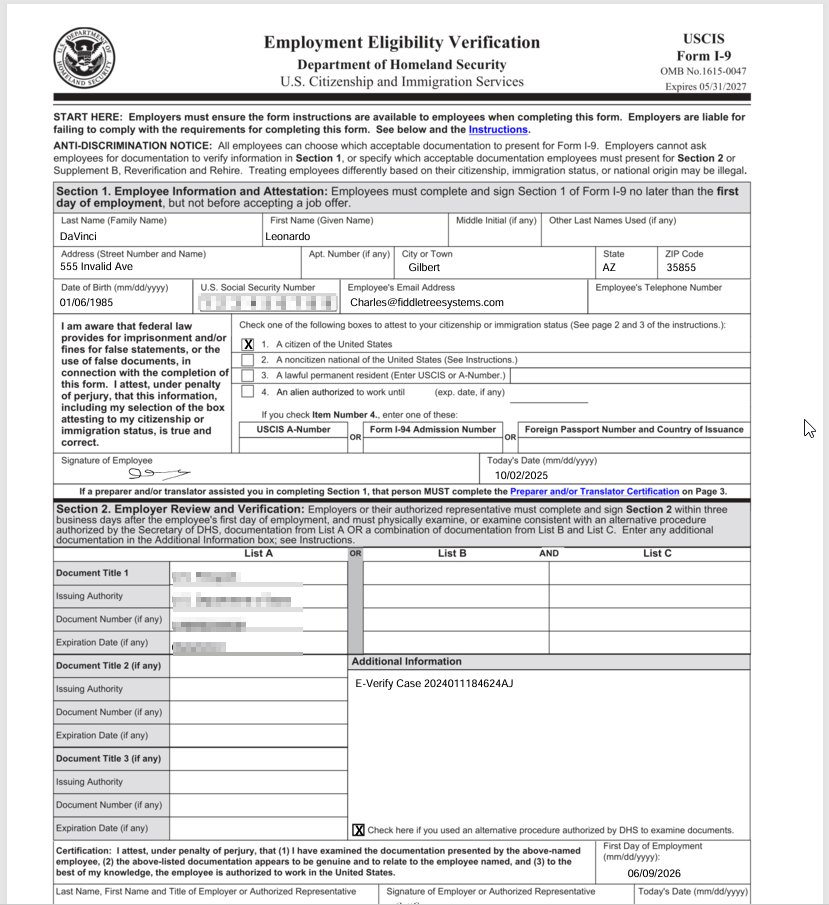
Was this article helpful?
That’s Great!
Thank you for your feedback
Sorry! We couldn't be helpful
Thank you for your feedback
Feedback sent
We appreciate your effort and will try to fix the article